Tasks can be an incredibly powerful tool to help you manage and direct your teams efforts on a Project. Let’s take a look at how to Create a Task for a Project.
Begin by accessing the project where you want to add the new task. Use the Navigation Bar located on the left side of your screen and click on the ‘Tasks’ page.

Look for the ‘ADD TASK’ button located in the top left corner of the Tasks page and click on it.

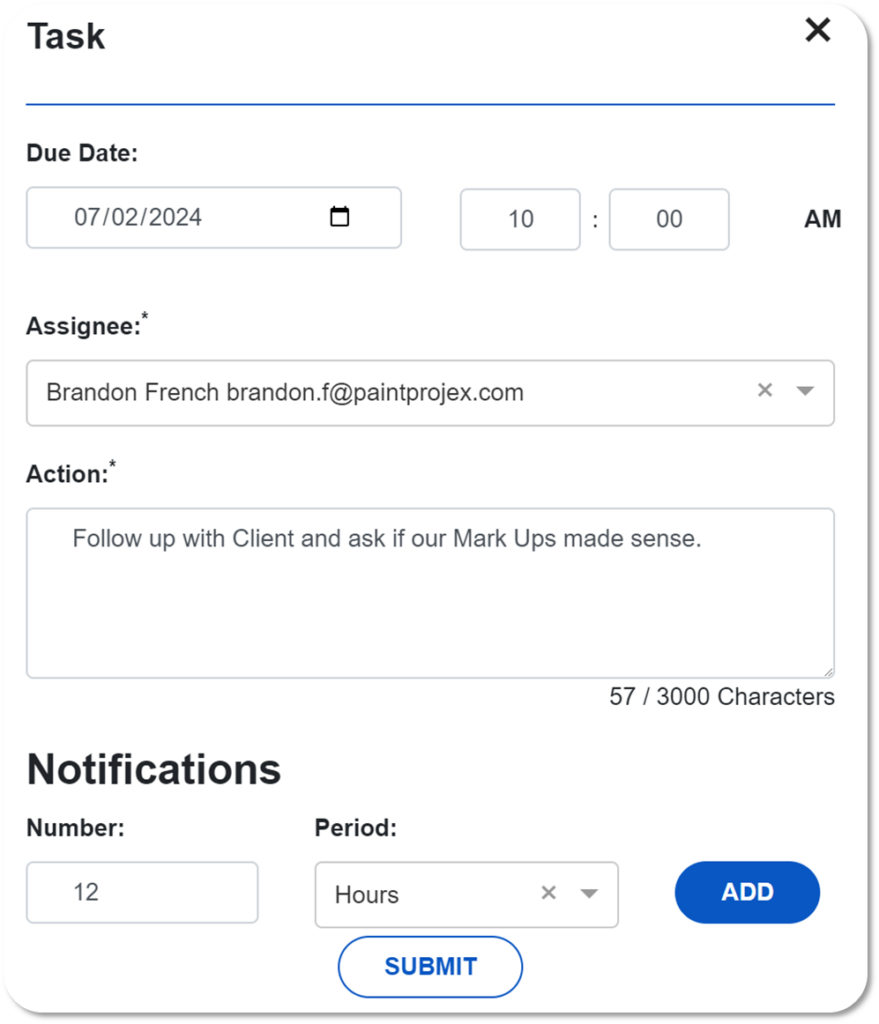
You will now see a pop-up window appear, here you can select the due date and time, who the Task is to be assigned to, Details or Actions required by the Asignee and any number of Notifications for the Assignee.
Specify when the task needs to be completed.
Select the team member responsible for completing the task. This ensures accountability and clarity.
Provide a detailed description of the task, outlining the actions required by the assignee. Be as clear and concise as possible to avoid confusion.
Set up any necessary notifications for the assignee. This will sent email alerts and system notifications to remind them of the upcoming deadline.
Before submitting, take a moment to review the information you’ve entered to ensure accuracy and completeness. Once you are satisfied with the details, click the ‘SUBMIT’ button to create the task.

After submission, you will see your newly created task listed among the other tasks for the project. This confirms that the task has been successfully added.

By following these steps, you can efficiently create tasks to manage your project more effectively. Tasks enable you to delegate responsibilities clearly and keep track of your project’s progress. Remember, the key to successful task management is clarity and communication.


