Navigate to the Page Navigation Menus on the left hand side of the screen. Click on the New Project button (the top icon).

Once you’re on the Create New Project page follow the below steps:
Firstly, enter in all the Clients for this Project. Select the drop down menu and select from the list of Clients you have already created (refer to “How to Create a New Client” guide).
Once you have selected a Client, now choose the Contact Person. Ensure that details are correct for that Contact Person, if they are not, you can update them on this screen.
NOTE: This will not save the updated details for the Contact Person, you need to edit the details in the Edit Client page (see “How to Edit a Contact Person”).
Now that all the details are correct click the ADD button.
If you ever add an incorrect Client you can always click the REMOVE button to completely remove the Client. If you select the incorrect Contact Person, simply click the Contact Person drop down and select the correct Contact Person.
An added Client may look similar to this:

Pro Tip
If you want to add another Contact Person from the same Client then you will need to add that Client again and select the 2nd (second) Contact Person.
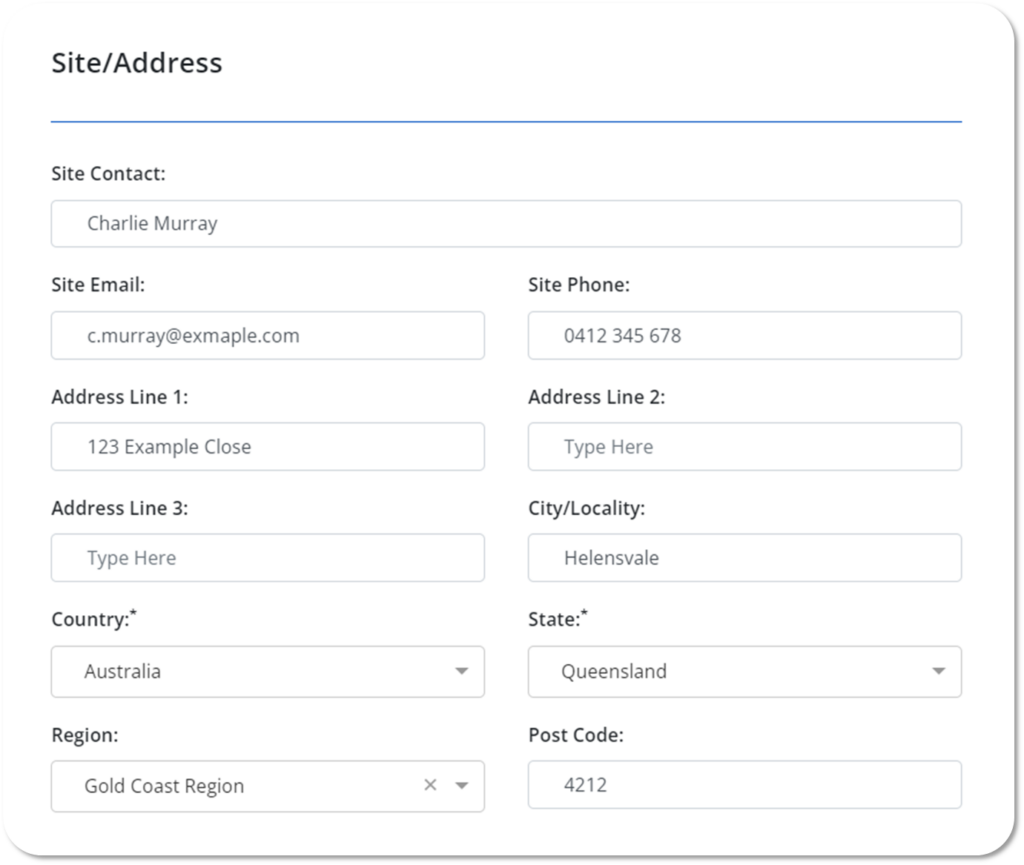
Secondly, update the Site/Address for the Project. This is where you will add who the main Contact Person for the site is, the best contact details for the Project, and where the Project is located.
Site Contact – Name of the main contact on site.
Site Email – Email address for the site.
Site Phone – Phone Number for the site.
Address – Street Address of the site.
City/Locality – Suburb of the site.
Region – General Region of the site.
A completed Site/Address may look similar to this:
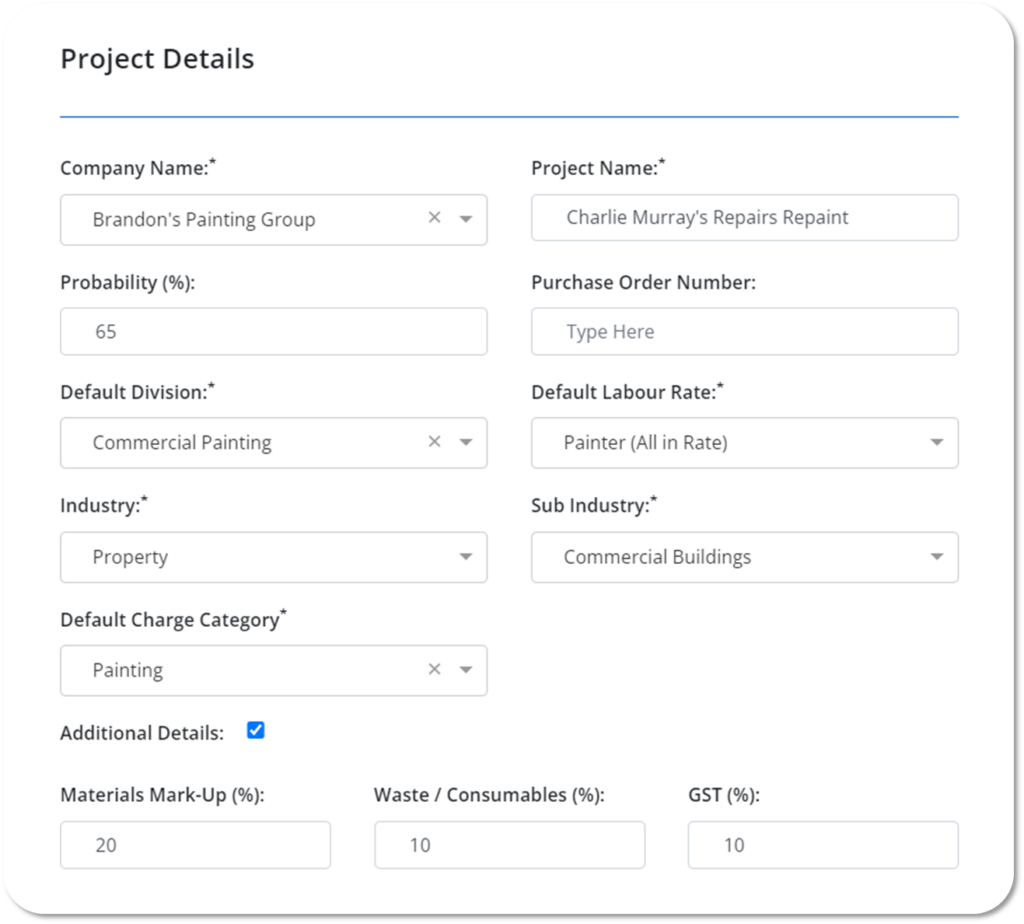
Thirdly, enter in all the Project Details.
Company Name – Choose what Company you are assigning this Project to (if you have multiples).
Project Name – This is what you will call the Project. This is also the name you’ll use to search the System for this Project.
Probability (%) – Type in the Probability (in percentage %) of winning this Project.
Purchase Order Number – If there is a Purchase Order for this Project this is where you will enter in the Purchase Order Number.
Default Division – Choose which Division this Project will belong to.
Default Labour Rate – Select what the Default Labour Rate will be for this Project. You will be able to change this for each individual Charge.
Industry – Select the Main Industry that best suits this Project.
Sub-Industry – Select the Sub-Industry that best suits this Project.
Default Charge Category – Select what the Default Charge Category will be for this Project. You will be able to change this for each individual Charge.
There is a check mark for Additional Details – If you click the check mark you will now be able to see and edit the some key factors that go into calculating costs.
Materials Mark-Up(%) – This is a safety buffer to allow for any errors in calculation of meterage and for any unforeseen variables.
Default is 20%
Waste/Consumables (%) – This is to cover any spillages or extra waste of products.
Default is 10%
GST (%) – This is standard Australia Tax on all goods and services.
Default is 10%
A completed Project Details may look similar to this:
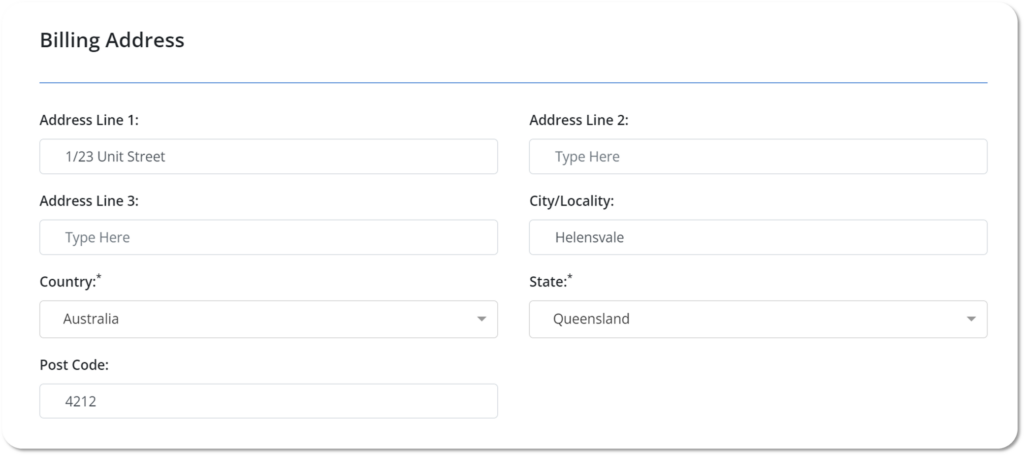
Fourthly, enter in the Billing Address details. This is where any Invoices or Products will be delivered to. Ensure these details are correct before proceeding.
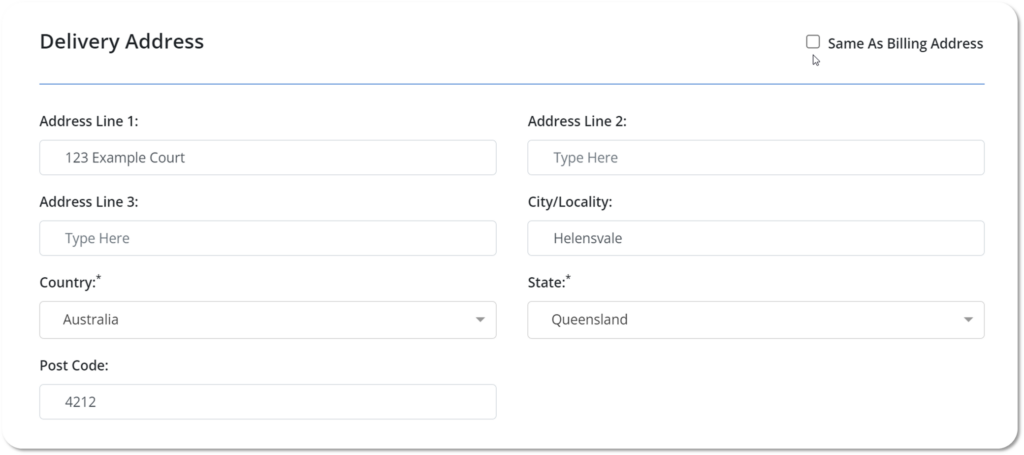
A completed Billing/Delivery Address may look similar to this:
Pro Tip
You can change the Delivery Address to be different from the Billing Address by unticking the Same As Billing Address tick box. If you do make sure you enter all the correct details as this is where all Product Purchases will be shipped to.
Next, enter the Sales Information.
Estimator – The main person who will be creating the quote for the Client.
Sales Person – The main person who will be following up and communicating with the Client.
Lead Source – How you found out/sourced this Project.
Project Manager – The main person who will be running and looking after the physical Project.
Terms (Days) – How long your Quote/Terms are valid for.
A completed Sales Information may look similar to this:

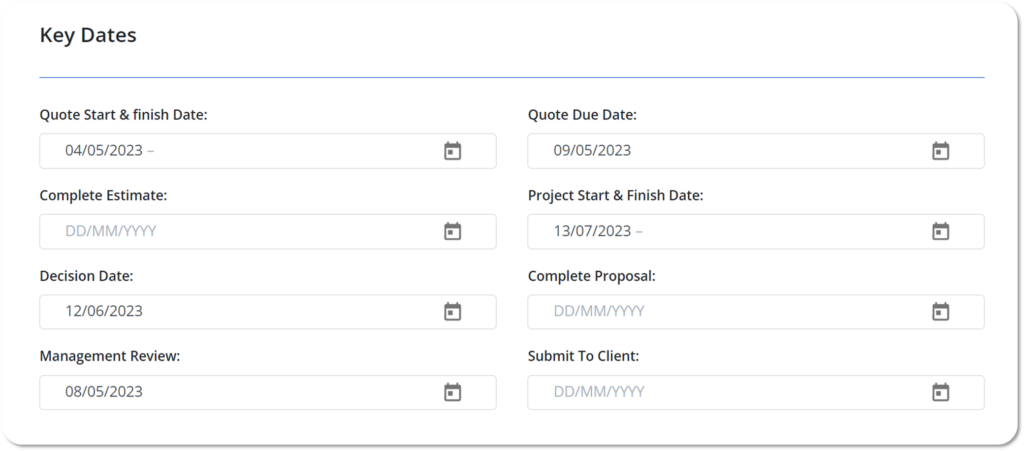
Finally, enter any key dates for this Project.
Quote Start & Finish Date – The dates when you are going to start the Quote and expect to finish the Quote by.
Quote Due Date – The date when the Quote is due.
Complete Estimate – The date when you completed the Estimate for this Project.
Project Start & Finish Date – The dates when you’re suppose to start on site and the projected finish date.
Decision Date – The date when the Client will decide who will be awarded the Project.
Complete Proposal – The date when you completed your Proposal for the Client.
Management Review – The date you’ve organised with Management to review your Estimate/Quote.
Submit To Client – The date when you submitted your Quote/Proposal to the Client.
Pro Tip
When creating a Project you might not have the required information to fill out all of these dates, you can always update these dates at a later time when you have the relevant information.
A completed Key Dates may look similar to this:
Once all the necessary fields have been completed you can now click the CREATE PROJECT button.
Pro Tip
It’s not necessary to fill out every field, only the ones marked with an Asterix (*) are required to create a new project, however, the more information you enter the more accurate your reporting and searches will be.