Navigate to the Search Clients page via the Page Navigation Menus on the left hand side of the page.

Now click on the CREATE NEW CLIENT button on the top left of the page.
This is where you can now fill in and create your Client.
To get the most out of the App, enter as many details as possible.
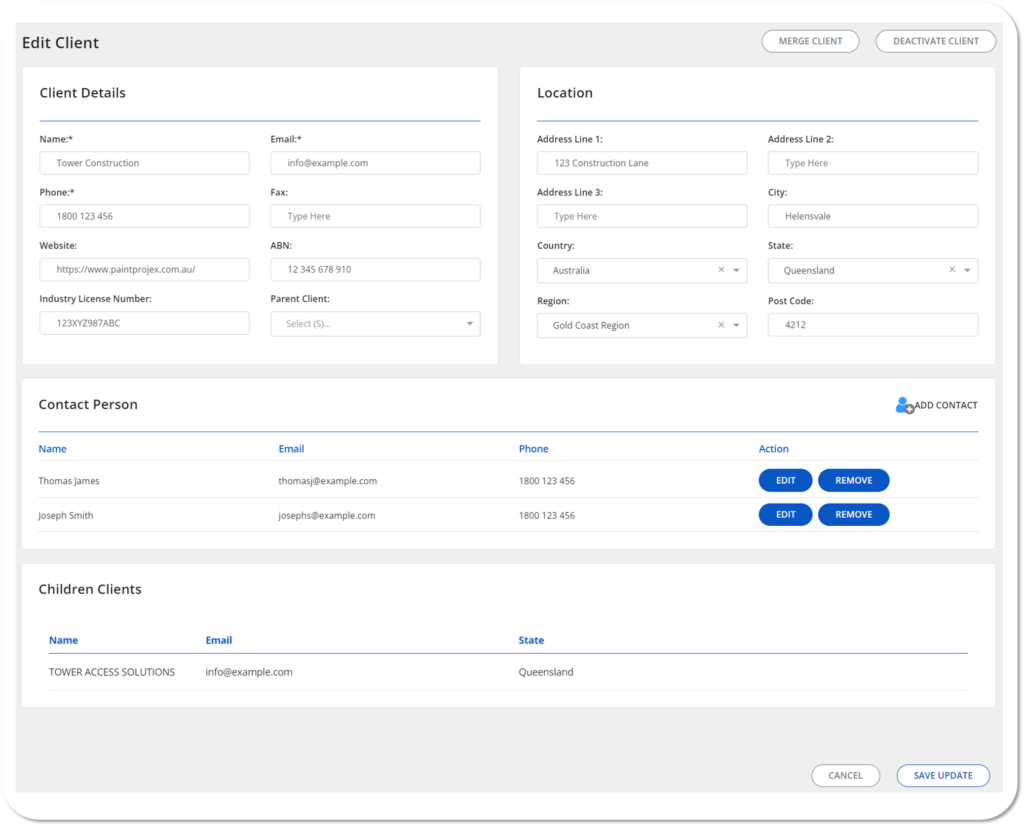
Client Details – This is where you will entre the Client Company’s Details such as their Trading Name, Head Office Contact Details, ABN, etc. (this is their Companies General Details).
Pro Tip
You can assign a Parent Client to a Client Company, when you review the Parent Company all linked Companies will appear under Children Clients.
Location – This is where you will enter the Client Company’s Location (generally their Head Office Location).
Contact Person – This is where you will enter all People and their details you are communicating with at your newly entered Client.
You can also assign a Relationship Holder if someone within your Company maintains the relationship with a particular Contact Person.
Children Clients – If any of your other Clients have listed this current Client as their “Parent Client”, then they will appear here. If you have not created any other Clients yet then nothing will appear.
Pro Tip
You can click on a Children Client and it will automatically open up that Companies details.
A completed Client might look something like this:
